
WARDOGS Mortar Guide: Where to Place It and How to Aim
Mortars are not carried weapons but FOB-mounted fire support. Build order, aiming method and evidence grades, with community claims labelled as such.

Short answer: a WARDOGS mortar is not a carried weapon — it is fixed fire support mounted on a FOB. You build the FOB, move ammunition supplies into it, and then mount the tube with the build hammer; firing consumes the ammunition stored in that FOB rather than your own inventory (community testing). Its value is not accuracy but sustained suppression of FOBs, vehicles and strongpoints outside the defender’s line of sight; the price is a fixed position that is easy to counter once located. There is no official mortar tutorial, so this page separates what officials confirmed from what the community measured.
What a mortar actually is in WARDOGS
It belongs to the building system, not to your weapon slot. The official store page lists FOBs, building and destruction, and double cash in the hot zone as core mechanics. A media guide states directly that a FOB lets a team “set up mortars, activate drills to pull the hot zone closer”. It adds that a FOB at the base of a tower is a strong sniper position.
| Item | Current state | Basis |
|---|---|---|
| Form | Fixed fire support mounted on a FOB, not carried | Media guide (Polygon) on FOB use; community testing |
| Unlock | Community testing: a tier 3 build hammer unlocks mortars, SAM sites and kamikaze drones | Creator tip list (DemoMan0351, 40 tips) |
| Ammunition | Community testing: firing consumes ammunition stored inside the FOB | Same source |
| Neighbours | The same FOB can host SAM sites, a drill (fuel to pull the hot zone) and supply points | Media guide plus community testing |
| Official data | No official unlock level, damage or range figures exist | Steam store page and announcement feed |
Why it is worth the trouble, and why it dies easily
Worth it because the suppression is invisible. Most fights happen inside someone’s line of sight; a mortar covers exactly the side the enemy believes is safe: defenders tucked inside a FOB, vehicles parked on a reverse slope, infantry reorganising indoors. Combined with the official double cash in the hot zone rule, holding down the hot zone often doubles income at the same time.
It dies easily because the position is fixed. The tube does not move with you, so once the enemy locates it the counter options are plentiful: a spotter on a reverse slope, a flanking squad, or one committed push. The real tactical question is therefore not “how do I aim” but “can I still hold or move it after I fire”.
Build order: six steps
- Pick the position before you buy anything. Priority is “logistics can reach it” plus “cover or reverse slope”. A lonely hilltop looks great and hands the enemy your coordinates.
- Build the FOB and reserve the gun pit. The FOB is the mortar’s carrier and its ammunition store. Decide before building which side the tube faces, and which side the crew hides on.
- Move ammunition supplies into the FOB. Shuttle them with a vehicle that carries supplies, then confirm the supplies landed in this FOB rather than piling up at the door.
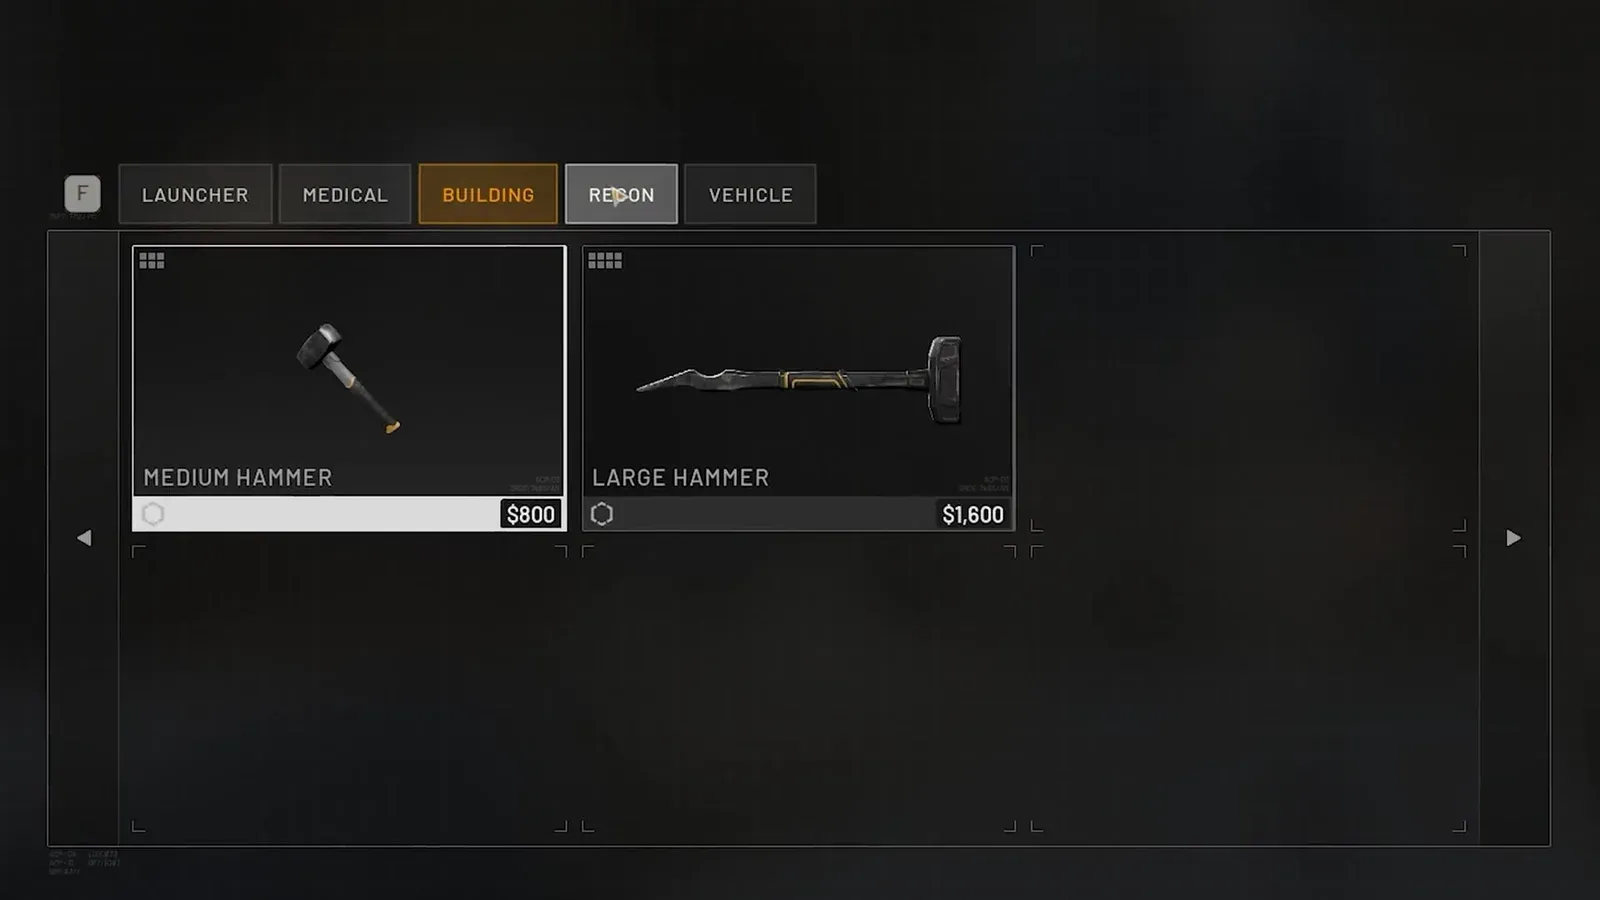
- Mount the tube with the build hammer. Community testing says a tier 3 hammer is required. If the menu does not offer a mortar, check your level and prerequisites instead of retrying.
- Assign a spotter before firing. The spotter calls targets from a second angle (buildings, vehicles, FOBs) while the gunner works from one shared set of references and corrects.
- Reassess after three to five rounds. Set a rule. If the enemy starts flanking or a spotter appears, move immediately. If your infantry is pushing, add a few rounds and then break it down.
How to raise your hit rate
- Fire from a fixed position. Every move invalidates the previous correction, which is the most expensive time you can lose.
- Treat the first round as ranging, not a kill. Have the spotter read the fall of shot and correct instead of expecting a first-round hit.
- Prioritise targets that cannot move. FOBs, parked vehicles and fixed firing points are worth the ammunition more than running infantry.
- Use one shared frame of reference. “The roof of the second building on the north side” has to mean the same thing to both of you.
- Do not use it as a sniper rifle. Accurate fire depends on the target being predictable, not on how much magnification you carry.
Four common mistakes
| Mistake | What happens | Fix |
|---|---|---|
| Mounting the tube before solving logistics | Two rounds in and you are dry, with the position already exposed | Get the supply run working before you build the pit |
| Putting the FOB on an exposed high point | You trade sightlines for being spotted and countered | Prefer a reverse slope or a building, and build cover if needed |
| No spotter, correcting by feel | Every round is a gamble and the ammunition buys nothing | Assign one spotter whose only job is calling and correcting |
| Firing and staying | The enemy learns the position and takes the tube and the crew | Decide up front how many rounds you fire before leaving |
Sources and boundaries
Official mechanics ($10,000 starting balance, cash for teamplay actions, cash persisting between matches, double cash in the hot zone, the building and destruction system) come from the official Steam store page. A FOB being able to host mortars and a drill that pulls the hot zone closer, and a FOB at the base of a tower being good for snipers, come from the media guide Polygon: The best ways to make money in Wardogs. That is a media field test, not an official statement. The question itself is carried by several independent pages, for example PCGamesN and the IGN wiki, which is external evidence that the demand exists.
The tier 3 hammer unlock, ammunition being drawn from the FOB, and a FOB being hackable and taken over (about 30 seconds, with an audible warning) come from the creator tip list Over 40 Wardogs Tips I Wish I Knew Sooner (DemoMan0351) and are community testing, not official statements. The build and employment order follows the creator tutorials How to Use Mortars in WARDOGS | Complete Tutorial (SC Haulers), the correction method in Wardogs How to ALWAYS Land Mortars or Artillery (SwoleBenji) and a related FOB build demo, Wardogs - Portable AA tower (RadioGLHF). The embedded video for this page is (wiWNoWiQy_Q), which represents that version’s handling.
This page does not publish damage, range or ballistics tables, and does not rank numbers: the developer has not released them, so any specific figure is an unconfirmed community claim. Unlock levels can change with later patches — if a patch reworks the level curve, trust the in-game build menu. Neighbouring pages: the mortar balance debate covers the argument, and building and destruction covers general build rules. The Control Zone guide covers towers and the hot zone, and the money-making guide turns suppression into income.
Related Articles
guide
WARDOGS Balance Debate: Infantry, Mortars and Sniper Towers
Infantry feels high-risk and low-reward, the mortar shell camera feels too strong, and sniper towers are brutal. Both sides of the argument, and what changed.
guide
WARDOGS Cheaters and Anti-Cheat: Zero Tolerance, Plus an Honest Admission
Four parallel detection systems and a zero-tolerance policy, plus the developer admitting cheaters slip through and that launch false-banned streamers.
guide
Is WARDOGS Worth It? The $39.99 Checklist Before You Buy
Official facts as of September 14, 2026: $39.99 Early Access, 37 weapons, 3 maps, 1.0 still 1-2 years out. Four checks to decide if it is for you.